Category: Ableton

  • Ableton reArranger Device Released!

    Ableton reArranger Device Released!

    A great easy way to finish your songs by trying out different arrangements easily, a device I’ve been developing slowly over the last three years – now I’ve tidied it up for everyone else to use, so try this free device

    When you are stuck finishing your song – you have some great sections but can’t decide how best to arrange them. All those great loops, builds and drops … perhaps you are wondering if you should insert a longer middle section, or is the whole thing too long, or too short? It can be tricky to cut, copy and paste sections of an arrangement just to try these ideas out. Especially if you don’t know how to put them into an order that works! What is the best intro? Should it have a 16 bar riser or an 8 bar one? What is the best middle section?

    So often we can become paralysed by choice, and also it can be daunting to copy and paste big sections of your arrangement and the automation gets all messed up, and we get confused!

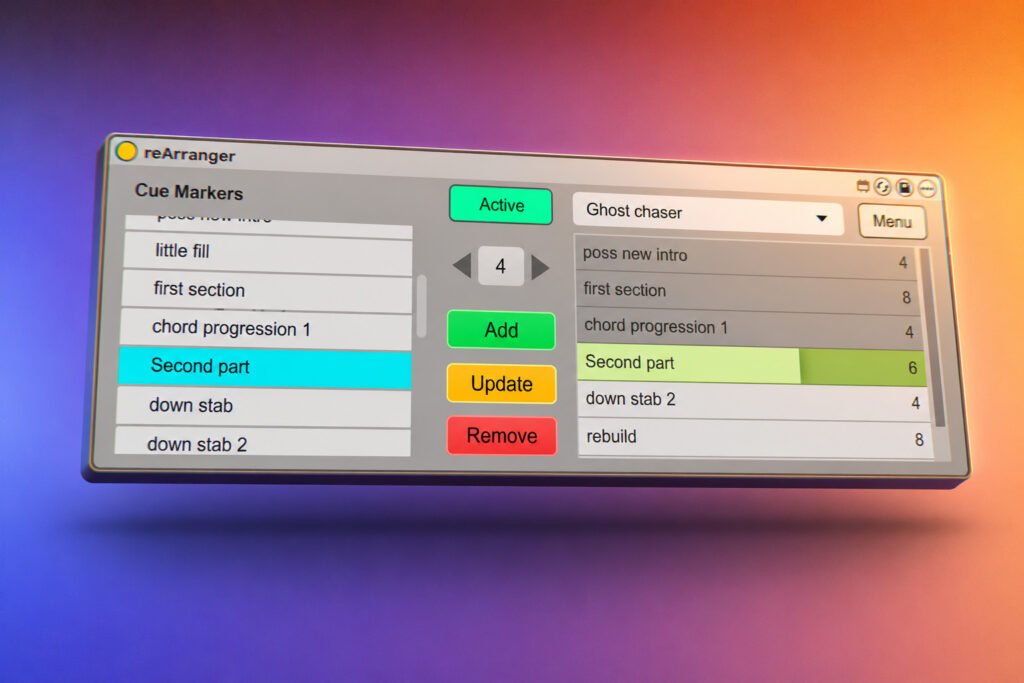
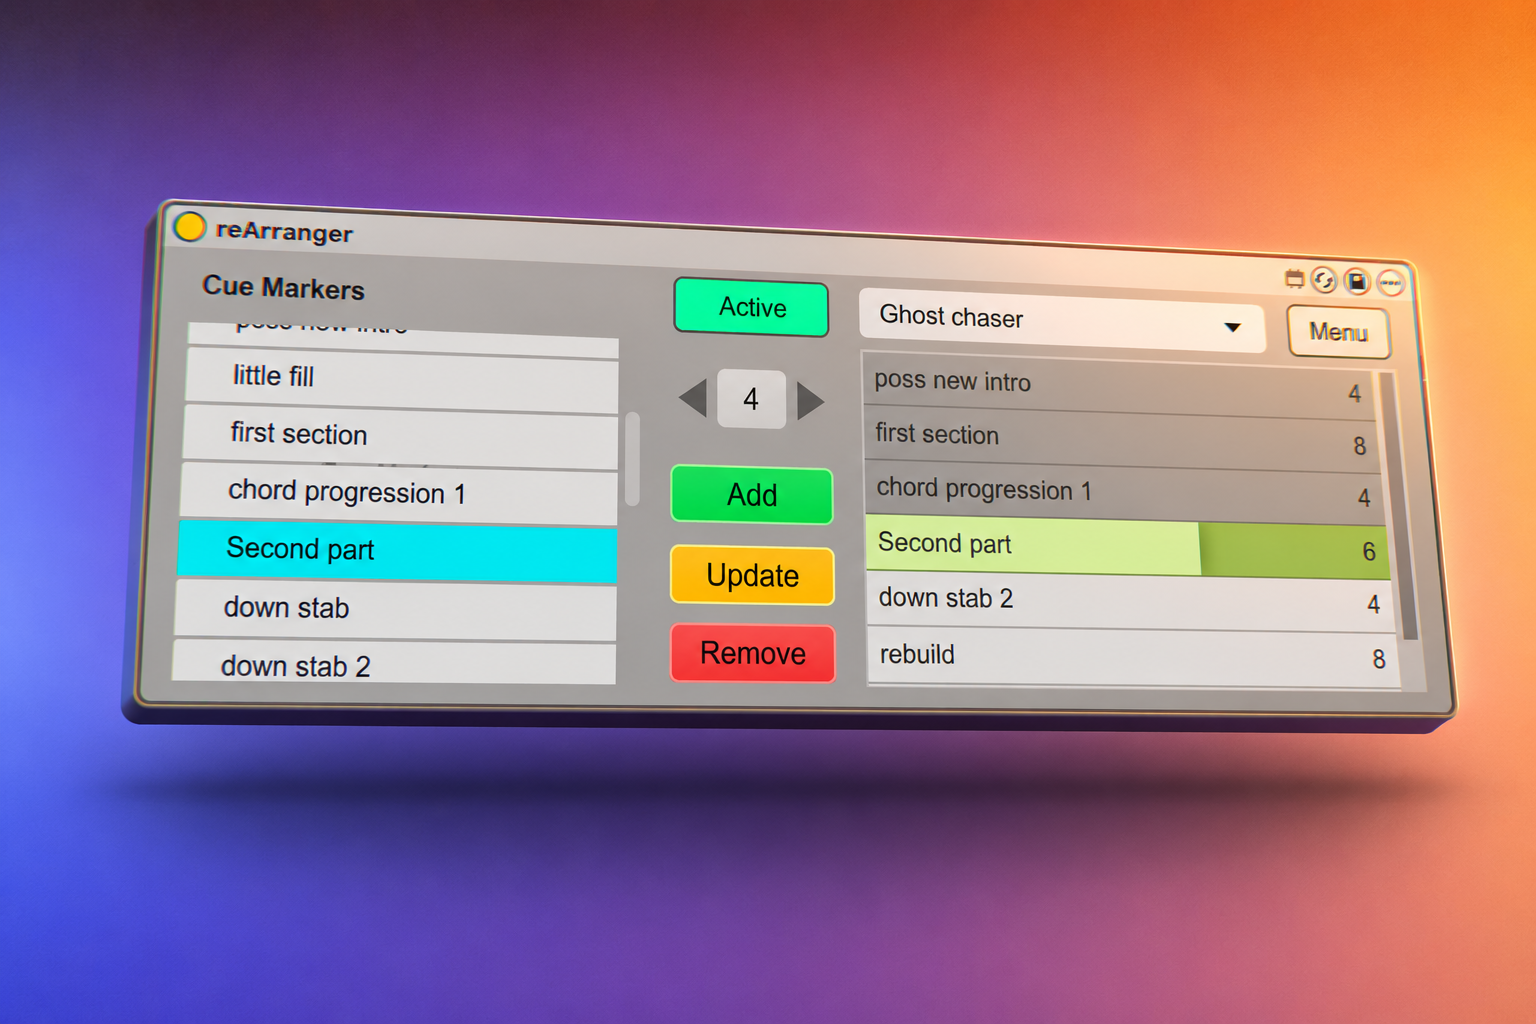
    Well, here’s the solution. The reArranger allows you to create sections of your song and play them in any order, non destructively – until you find the perfect arrangement. Additionally you can have multiple arrangements so you can try a “short” version, a “long” version and a “experimental” version of the same song in the same Live set.

    REQUIREMENTS

    You will need Live 12, either Live Suite, or Live 12 Standard with the Max For Live add-on.
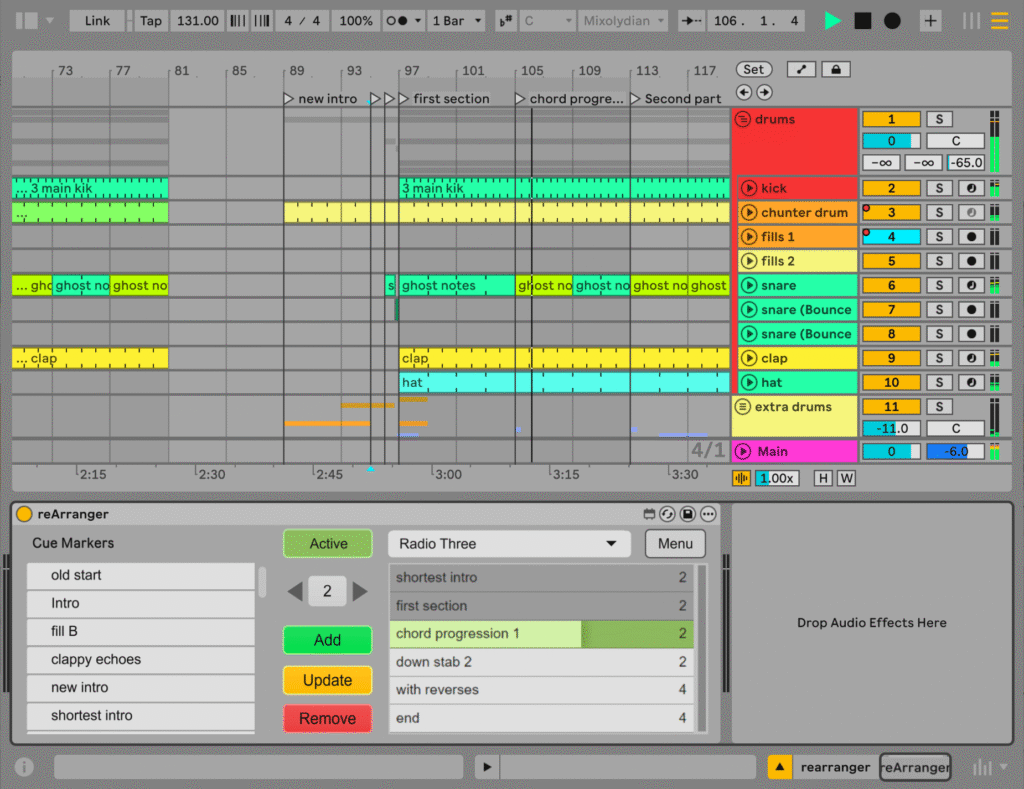
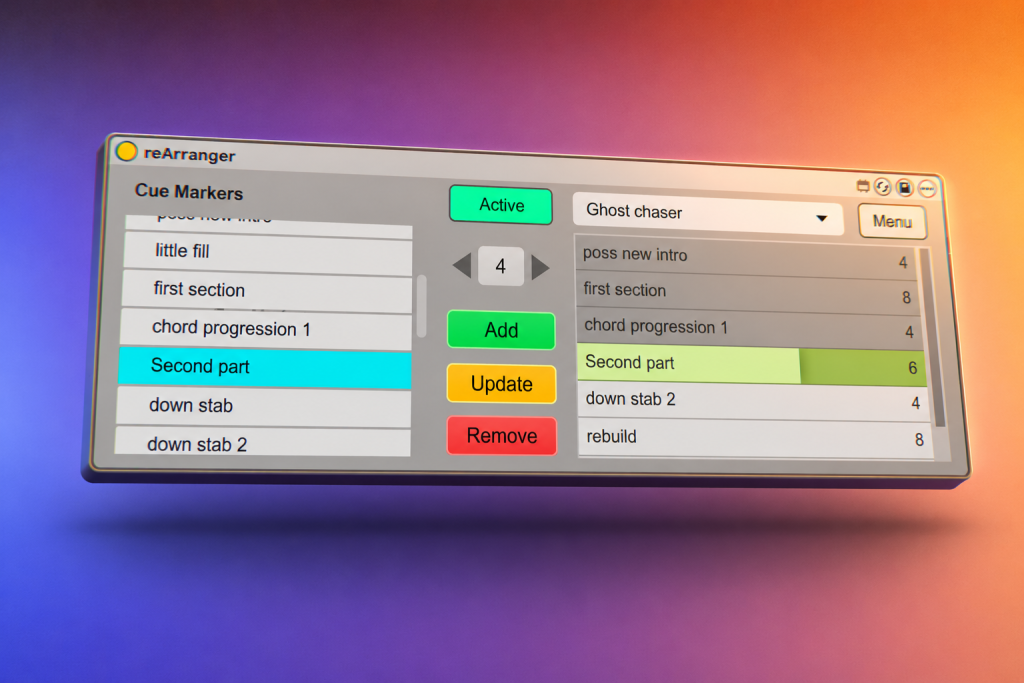
    angstrom's rearranger device for ableton live showing the arrangement sections and the playlist

    Features

    • Create dynamic Ableton Live Arrangements
    • Make playlists of cue markers and play them back in order
    • Drag and drop re-arranging of Ableton Arrangement sections
    • Non-destructively try out several different versions
    • Multiple Playlists so you can try out different arrangements
    • Playlists are saved with each song and can be exported, backed up and more

  • Ableton 10 – Calcium skin

    Ableton 10 – Calcium skin

    Many users liked the old calcium skin for Ableton Live, and find the new skins for Live 10 a bit gloomy and lacking contrast. So I remade Calcium skin for Live 10. There are some differences becuase Live 10 has different transport buttons that the earlier versions, but it’s as close as I could get.
    Live 10 skins are much easier to edit than Live 9 skins (which required a hex editor). Live 10 skins are in an XML format and each element is named.  If you want to change anything about this skin simply open up in a text editor and start tweaking. It’ll probably break but that’s how we learn eh?

    Download Angstromium Skin
    If you see a wall of text try right clicking and “save as”

  • Ableton’s Operator – 13 advanced tips

    Ableton’s Operator – 13 advanced tips

    Ableton Operator is a small FM synth which comes with Ableton Live Suite. Operator may seem limited to familiar traditional FM sounds but it is capable of much more. Here I show thirteen advanced tips and a few ways to use Operator’s lesser known features to create bigger sounds. and a few you might not expect, ranging from deep rumbly analog-style basses, evolving leads and pads.

    1: Make oscillators morph from sine to “sawtooth”

    The oscillators can be set in various FM modulator / carrier routings, but if an oscillator has no modulator input then the oscillator feedback parameter becomes available. Setting an oscillator waveform to sinewave and turning up the feedback parameter will feed the sine wave pitch back on itself and you will hear the sine morph into a waveform which sounds and looks quite similar to a sawtooth.

    This waveshaping effect is is dependent on the oscillator amplitude (as amplitude induces feedback), so turning the oscillator up will take the waveshape closer to a “Saw”, turning it even higher will make it  distort toward noise, and turning the amplitude right down will take the waveshape closer to the original sine.

    The oscillator amplitude is obviously affected by its (amplitude) envelope and by all the other modulation sources mapped to oscillator amplitude – LFO, Aux envelope, modwheel, after touch, etc.  meaning you now have deep control over the waveshape of these oscillators.

    Of course – morphing a sawtooth wave into a sine wave is very similar to what a lowpass filter does it removes high harmonics – but the benefit here is that each of the four oscillators can independently vary from saw to sine, as if you had 4 independent filters (or 5 if you count the filter itself !).  Additionally the smooth interaction between volume and waveshape gives a good almost natural physical modelling feel to the waveform. It’s a unique sound.

    2: Invert harmonics for hard to reach waveshapes (a Triangle wave)

    Operator has a very handy method of drawing your own waveshape with partials and you will be able to get clues for how common waveforms look as harmonics by studying the built in waves.  Not all waveshapes are possible with the basic approach. The reason for this is that harmonics also have a phase relationship, a fundamental might be oscillating up while the third partial is oscillating downwards (180 degrees out of phase). This is the case with the humble Triangle wave.

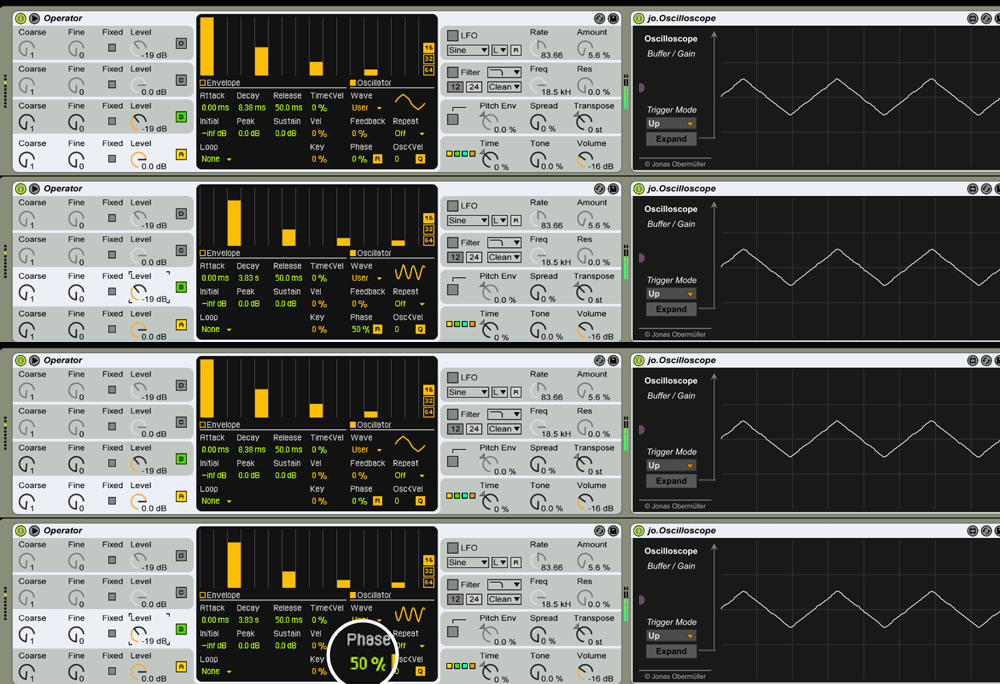
    The basic additive waveform drawing system of Operator does not allow for drawing harmonic phase relationships but we can emulate out of phase partials by using a second oscillator with a waveform phase offset.  50% of offset is 180 degrees of phase difference.

    A triangle wave contains the same odd numbered partials as a square wave – yet is plainly very different in sound.  In a triangle wave the phase of the upper partials is 180 degrees out of phase with the fundamental. You can see in this image that Oscillator A is handling one group of harmonics (1,5,9,…) and the second oscillator (B) is taking care of the harmonics which are inverted. Combining these two oscillators together allows us to create a waveform with harmonics with relationships which are out of phase with each other. In this case we make a Triangle wave, but the same principle allows other (otherwise unavailable) waves.

    Notice that PHASE INVERSION on the B oscillator which is what makes our complex triangle output.

    Triangle / Square wave morph

    In the above GIF we can see what happens if we make oscillator D a copy of oscillator B but turn in Oscillator D make sure to reset the phase parameter of that oscillator down to 0, and then by using the LFO to crossfade between these two variations (B and D) the wave changes between a triangle and a “square”.  the same principle can be used to create more complex harmonic shifting effects. See tip 5 for more on this.

    (more…)

  • Ableton guitar amp simulation and effects

    I have been using Ableton’s built in effects for guitar recently and despite owning a few other VST based sims I’ve found the Ableton effects in racks to be much more useful, because of the ability to shape them to my requirements.

    So, I’ve provided four of my (many) guitar amp experiment racks for you to download here.

    Guitar Amp Ableton Audio Examples

    In these I use the same short loop of me playing guitar badly and then for each “ampI tweak the provided macro dials to show the variations each amp can reach.
    Dual Crunch Amp

    Clean / Dirty hilo Amp

    Pro Vib Amp

    Twang and Fuzz Amp

    Investigating the sounds of Ableton Guitar Amps & Sims

    Initially I found the “amp” and “cabinet” which Ableton include to be a little underwhelming yet I know they are licensed in from well regarded company Softube. So I decided a few months ago to investigate more fully.  What I discovered is that if I “Bi-Amp” then it’s possible to get a rack which responds better to different playing techniques, has a more intriguing variance over the dynamic range and also has a more interesting sound across the stereo field.

    So here are the four effect racks all wrapped up inside a live set, just for handiness. Please note that if you say “why isn’t this making any noise” you may have to check your input routings 😉

    ableton set guitar-amps-examples

    You can obviously use these on any material, not just guitar.